Hello, I hope everyone is staying warm. It's been so cold here, I took the day off from Christmas shopping and decided to stay home and get some work done.
Here in South Western Pa, The Steeler fans are all coming off of a great Sunday night game and everyone is talking "Playoffs... Playoffs"!!! Our Pittsburgh Penguins are also on a hot streak so I made snowman ornaments that any Steeler/Penguin fan would love. They have wire in their hats so you can bend it around a tree limb or door knob. They are based on a pattern by Isn't That Cute. Email me if you have any questions.
I have them listed here on my website Crafts By Jodi
Have a great week!!
Jodi
Wednesday, December 8, 2010
Tuesday, November 23, 2010
Snowman ornie and a Recipe
Hi, I'm working on some more snowman ornies. These were a big seller at my craft shows, I actually sold out of them, so I am getting a head start for next year! They can be hung on a tree or they are perfect as bowl fillers.
I attached a tag that says " Wish I may, Wish I might, Make a wish on a Snowman Star Tonight."
I've also been getting ready for our Thanksgiving dinner. I try to come up with new ideas to take to my parents house, but my brothers won't let me in the door unless I bring these Mushrooms!
Here is the recipe.
Stuffed Mushrooms
Large Stuffing Mushrooms - Approx 36
1/4 Cup Onions
1 Tsp Garlic Powder
1/2 Stick of Butter
2- 6 oz cans of Crabmeat, rinsed and drained
2-8 oz Chive & Onion Cream Cheese
1/2 Cup French Fried Onions
Clean mushrooms, remove stems. Chop mushrooms stems and onions in processor. Saute in butter. Add garlic powder. Drain but reserve the butter. Mix cream cheese, crab and mushroom stem mixture together. Pour butter mixture in bottom of glass baking dish. Spoon cream cheese/ crab/mushroom mixture into mushroom caps. Place mushrooms in baking dish with butter. Crush French Fried onions and sprinkle on top of mushrooms.
Microwave for approx 5-7 min. Depending on size of mushrooms.
Serve hot, and Enjoy!
Enjoy your holiday!
Jodi
Saturday, November 6, 2010
That time of year
Hi, it's been awhile since I have posted anything. We just finished up our last show of the year. It was great seeing everyone again. We get to catch up with our repeat customers and meet some new ones! Plus we get to chat with our crafting neighbors....when it slows down! The shows were really busy. I need to make sure I have more for next year, I sold out of a lot of items.
I took time out to get my house back in order, and now I'm anxious to get started on my inventory for next year. We start early, but every year there seems to be the last minute rush before the shows.
Here are some pics from a couple of our shows. The first one is from The Covered Bridge Festival in Mingo, Washington, Pa. The second and third is from the Washington County Fairgrounds in Washington, Pa.
Thank you to all that came out to say hi!!
Monday, September 13, 2010
New handpaintings
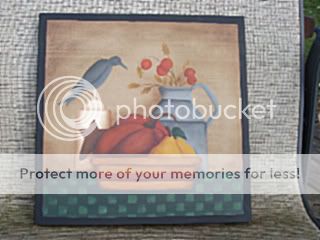
Hello! I wanted to share my newest paintings. I have been working on things for my shows, and I came across a lady by the name of Maxine Thomas. She is an amazing artist and she has several books and patterns out. They really caught my attention because she uses acrylic paints and yet her paintings look like oil paintings. I have been wanting to get back to my oil paintings, I really missed it, and when I saw these, I knew I found something special. Below are a few of the paintings I have done. I will have these paintings at the show this weekend, but after the show, I will be painting more to post on my website for sale.
Don't forget this weekend I will be at the Covered Bridge Festival in Mingo Creek Park. For more information check out my article.. http://craftinwithjodi.blogspot.com/2010/08/craft-show-dates-and-new-items.html
Here are my paintings!
Have a great week, hope to see you at the show!
Jodi
Don't forget this weekend I will be at the Covered Bridge Festival in Mingo Creek Park. For more information check out my article.. http://craftinwithjodi.blogspot.com/2010/08/craft-show-dates-and-new-items.html
Here are my paintings!
Have a great week, hope to see you at the show!
Jodi
Monday, August 23, 2010
Craft show dates, and new items!
Hi !
It's almost show time! Our first show is on September 18-19th at the Covered Bridge Festival in Mingo Park, Washington, PA. For more info and directions check out this link
Covered Bridge Festival
We will be at the Ebenezer Bridge, in the same location, if you have never been at this show, we are located on the right side of the main bridge, in front of the first pavillion.
We have been working hard on some new items this year! We are also bringing back some of our best sellers!
Here are some pics of what we've been doing.
This is a prim doll bag holder. I made this because I was tired of having all those plastic bags scattered everywhere! It is based on a pattern by The Olde Country Cupboard.
The second pic is a sign I just finished. I hand painted it, based on a pattern from Maxine Thomas.
The third pic is a basket full of fall treats!
Have a great day!
Jodi
Crafts By Jodi
Monday, August 2, 2010
Homemade Salsa Recipe
Hi! In just a short time I will have more tomatoes than I know what to do with! I decided to start making salsa to use some of them up. I have been making this salsa for a few years now. I experimented with different combinations and I finally came up with this recipe. My husband wanted me to can 365 jars of this so he could have a jar a day!! If you prefer to blanch your tomatoes to take the skins off, you can do that also. I also learned a tip to squeeze the tomato to get extra water out of the tomato, it makes a thicker salsa. Enjoy!!
Jodi
Homemade salsa
7 cups diced plum tomatoes
3/4 cup jalapeno peppers, diced
4 cloves garlic
2 tablespoons cilantro
1 teaspoon reg salt
1 teaspoon hot salt ( I bought this in a restaurant you can just add a bit more salt and crushed red pepper)
1/2 cup red wine vinegar
2 tablespoons lime juice
1 dash crushed red pepper flakes
1 teaspoon garlic powder
2 cans chilies, chopped
1/2 can tomato paste
3 cups onions (RED AND YELLOW)
1 Add ingredients as listed above. 2 mix completely. 3 I like to can mine. 4 I put them in jelly jars and process according to canning instructions (leave 1/4 inch head room and process for 15 minutes).
Labels:
recipes
Sunday, July 25, 2010
New fall/winter items
Hello, it's been awhile since I posted, I've been busy with some new side projects. I'm still working on my inventory for the shows, in fact here are a couple of pictures of my newest crafts. I bought a pattern from Country Whims, it was a snowman head, but I still need more fall items so I made that pattern into a scarecrow head. I was so happy with the way they turned out I started making tons of them!!
Here is a pic
We have also been busy with the new addition to our family! A new black Lab puppy, her name is Izzy.
She is a sweet heart, we have really missed having a dog in the family. She has been eyeing up all of my stuffed crafts! Maybe I need to raise them up a little bit higher on my counters! Ha!
Here is a picture of my daughter Madison and Izzy
Have a great week!
Jodi
Thursday, June 10, 2010
Fall Crafts
Hello, I've been working on several things for my shows....yes all at the same time! I jump from craft to craft not really sure what to do next. I have several ideas and my mind is going in all directions so I need to focus on one thing and finish it! I have done these turkeys in the past and he always sells out. It's my own design, so it's even more exciting when I see customers buying him. I love to hear the giggles when people see him. So I guess I know what I will work on today and hopefully finish!
Have a great day!
Jodi
Have a great day!
Jodi
Friday, May 21, 2010
Getting ready for a craft show- part 2.
Checklist for Craft shows
Here are some items that we take to the shows with us. It's nice to keep a list handy from year to year and you can add to it. It is usually so busy by the time the shows come around that you may forget something. I like to keep a little plastic tote with a lot of these items in it and then I just pack it with my cash register.
tent
display
chairs
tables
desk
fabric for covering tables
broom /dust pan
bags- we have regular sized bags and then we take garbage bags in case it's raining out and they buy larger items.
tissue to wrap fragile items
xtra price tags-for mark downs or items you missed
cash register/ register tape/ batteries or electric cords
Change- always take lots of extra change. Every year we write down how much we took and if we ran low on anything, then we know to adjust it the following year.
calculator
tax number to display- I use an old picture frame
tape
notepad
pens
business cards/holder
flyer/brochures
scissors
glue
wire, tools, and nails for fixing broken items
hammer
hot glue gun
paint/brushes- for touch ups
paper towels
wet wipes/ antibacterial soap
aspirin
hand lotion
cooler/drinks
snacks in case you can't leave your booth
sponge- I keep a damp one in a plastic soap dish so that I can dampen my fingers while handling money to keep dollar bills from sticking together
These are the basics. We also take items for decorating our booth. We get a lot of people asking if they can just buy our decorations!! In the fall we just use grapevine and some fabric pumpkins that my mom makes and at Christmas we use grapevine, clear lights and pip berrys. We don't like to put too much up because you want your crafts to be the main focus.
When we set up our booth we put all the fall items together and the winter/Christmas items together. I got a great display that holds 9 baskets and we put our ornaments and bowl fillers in it. Make sure to keep your booth looking neat. Anytime we get a few quiet minutes we go around the booth and fill any empty hooks and move things around. It's funny when we move something that hasn't sold all day, it always seems to sell as soon as it's in a new place.
You might want to print out this checklist and keep it with your supplies, and add to it after each show.
Good luck at your shows!
If you have any questions about craft shows, please leave a comment and I will try to answer all the questions.
Have a great weekend!
Jodi
Wednesday, May 19, 2010
Getting ready for a craft show
Hi, I have had a lot of questions about getting ready for craft shows. I have been doing them for about 7 or 8 years now and I learn something new every year!
Seriously though there is a lot to keep in mind when you decide to do a craft show. I will go over everything from the shows, how to make your display, items you won't want to forget to take, and a lot more.
This is a picture of our show we do in October. It's our inside show and we have 2 booths.
Right now we do only 2 shows a year. One of them is a 2 day show in September and the other is a 5 day (2 weekends) show in October. I have found that the fall shows are the best for me. You need to decide which will work better with the products that you sell. For instance, if you do florals, you may do well at the Spring shows. The best thing I did was to go to the shows that I was interested in and talk to some of the vendors. I would go to the shows with my parents, since we do the shows together, and look at displays. You will want to keep in mind the items you sell when looking at the displays to decide what is the best way to showcase your items. Every year we think that we have the booth exactly as we want it but we still change our booth every year! My dad laughs when my mom and I start a sentence with "we were thinking"!! He knows we have big ideas to change the booth around again! You will also want to look at where the vendors need to park and how far you will need to carry your items to the booth. It will help to know these things so that you can plan ahead. We bought a wagon to load our things on. You will want to decide if you would be able to do an outside show or if you need to be inside. Some shows have both inside and outside booths available. Sometimes the outside booths are priced a little cheaper. Just keep in mind the weather. If you make homemade chocolates, you may not want an outside booth in the middle of summer! One of our shows is outside and we have been lucky most years as far as the weather. We did set up the year when we had the horrible floods in 2004. We were lucky and didn't lose any merchandise although others were not as lucky. Sometimes the shows will offer to let you have an electric outlet. So if you need lights, or power for your register, make sure you ask about that. I bought a battery powered cash register because we do the one show outside and there are no electric hook ups there.
We have double booths at both shows. We needed to get tents for the show that is outside. We were able to find ours at Sam's Club. I can't remember the exact price but it was roughly around $100. They are both 10x10 tents and they do have the sides with them. We have both a velcro one and one that zips. I like the one that zips, it just seems easier to me. They are both EZ UP tents. Now our first time trying to put it up... I did not believe it was the right name for the tent!! Luckily my dad, mom and I get along great and we just laughed at each other! After we realized what we were doing, it did go up pretty easy. We get quicker every year! Our walls were made by my dad. He used pegboard and framed each panel. Yes, they are heavy but they work the best with our crafts. Some people use grid wire, wood, I have even seen chicken wire. Our other show is inside so we don't need the tents for it. Keep in mind that you want to design your booth so that your customers are able to move easily through your booth, so they can see everything. Our one show is so busy that the aisles are really packed with people and sometimes the flow of people just push people right past our booth. We opened our booth up so the customers can come into our booth and take their time to look at our crafts. We also put our cash register at one end of the booth. We get very busy and will have a line of people at the register. We designed our booth so that when this happens, our most popular items are not blocked by the line. My mom makes yardstakes and they sell so well, we had to figure out a way for her to refill them during our busy hours. Since I run the register and my mom wraps and bags the sales, it's hard to get away to refill our booth. She would try to get around the line and get through the crowd. It was really difficult to do it quickly so we asked my dad to add a "secret" door! We place the yardstakes right beside the door and then she just walks behind the booth, opens the door and refills the yardstakes without any problems. A lot of what we have learned has been through trial and error. You of course want to make sure you have lots of inventory for your shows. Even though we do just the 2 shows a year, we work all year long making crafts so we won't run out. Sometimes we still do! You will also want to keep in mind where you might want to keep your extra inventory. My mom and dad bought a trailer to keep their items in and we also put items behind our booth. Although some shows you must stay within your space.
My best advice is to visit craft shows you would like to attend, and ask questions!
My next entry will cover the items that you will want to make sure you take with you to the shows.
Have a great day!
Jodi
Thursday, May 13, 2010
Taco Salad Recipe
Printable Recipe
Hi, I decided to do something different today. Instead of posting one of my latest crafts, I thought I would share one of my most popular recipes. Cooking Thursday is hosted by Sandra at Diary of a SAHM! Stop by and visit for some yummy recipes! I just added this recipe to the blog.
I had originally got the recipe from my Aunt, and now whenever we have a get together, this is what I bring. I never have left overs!! I hope you like it, and let me know if you like the recipe posts. I can add them in every so often. I know I like to try different recipes.
I hope you enjoy!
Taco Salad
1 head iceberg lettuce
2 cups shredded cheddar cheese
2 lbs ground beef
1 package taco seasoning
2 tomatoes
1 onion
1 bag Doritos any flavor, we like the Nacho cheese flavor
1 (16 ounce) bottle Catalina dressing
Directions
1. Brown ground beef and taco seasoning.
2. Drain and let cool.
3. Chop lettuce, tomatoes, and onions.
4. Put into a large container.
5. Add cheese and crushed Doritos.
6..Add cooled ground beef.
7. Pour Catalina dressing over all of it 5 to 10 minutes before serving.
Labels:
recipes
Monday, May 10, 2010
Blog giveaway
Good morning!
I wanted to let you all in on a giveaway! It's from Marie's Country Woodcrafts. Marie does amazing paintings and this one is on a wooden spoon. She also finds some of the cutest items to paint. Check out her blog and sign up at /http://mariescountrywoodcrafts.blogspot.com/
Wednesday, April 28, 2010
Quilting Angel
Hi, here is another one of my angels I have painted. This one I painted onto a heart and then I put a crackle finish over it and then applied an antique gel on top of that. I've been painting a lot of angels lately. I will post more pictures of what I am working on soon!
Friday, April 16, 2010
It's a hockey night in Pittsburgh!!
If you are from or around Pittsburgh you already know this!!
The Pens are playing game 2 tonight in the playoffs. These jerseys are perfect to decorate your gameroom, or living room for your parties. I can make a jersey for any player you would like. I currently have Malkin and Crosby jerseys on my website Crafts By Jodi If you would like a different player just enter which player and number in the ''comments'' box when you order.
LET'S GO PENS!!
The Pens are playing game 2 tonight in the playoffs. These jerseys are perfect to decorate your gameroom, or living room for your parties. I can make a jersey for any player you would like. I currently have Malkin and Crosby jerseys on my website Crafts By Jodi If you would like a different player just enter which player and number in the ''comments'' box when you order.
LET'S GO PENS!!
Thursday, April 8, 2010
Harvest Blessings Angel
Click on picture to enlarge
This is my newest creation! I know, everyone is looking for spring/summer items right now, but I usually only make fall/winter crafts because of the shows I'm in.
This angel is handpainted onto a wooden heart that I cut out. It measures 9-1/2 W by 12-1/2 H. I have seen these angels and just love their cute little faces. I thought she would look adorable holding a pumpkin and painted with some fall colors.
I just added her to my website http://www.craftsbyjodi.com/ Click on the Fall category.
Thanks for stopping by!
Jodi
Monday, March 29, 2010
Angels
Hi, I have been working on crafts for my shows. They aren't until September and October, but I have to start early. I have been doing lots of snowmen, etc. I found a pattern by Country Whims for a snowman angel and I changed it into a doll angel. I did a blonde, brunette, and red head! I think they are an adorable gift for a friend. The card on the inside says "Times may be tough, but you will see.. things will get better if you Believe" I will be posting several new items on my website soon.
Thanks for stopping by!
Friday, March 12, 2010
Check out these sites!
Designed By 9 Photography is my Brother In Law's new Etsy store. It has some images that are available in print and other creative media. Some were actually taken at my home. Glen does an amazing job at capturing the perfect shot.
Here is a sample of his work.
To see more of his work, please check out http://www.etsy.com/shop/designedby9
Another great site to check out is Designed By 9.
My Sister In Law does web development and design, ecommerce solutions, and hosting , brochures, annual reports, data entry, forms, business cards. They do it all!
Deb designed my first website and has made brochures and business cards for my craft shows. The brochures and business cards are one of the best things you can do for your business to get your name out there. I even had some magnets made so that when your customer uses them on the fridge or wherever, it is a constant reminder of your business. For more information about them and what they can do for your business, check out their website:
Designed By 9
Fresh, clean design online & and on paper
http://www.designedby9.com/
Tuesday, March 2, 2010
Ready for Spring!
After being cooped up all winter long, I'm ready to brighten up the house with some spring decorations. I didn't really know what I wanted to do until my sister in law sent me some pictures from a catalog. I can't afford the beautiful things they had so I had to recreate something like it with the things I had around the house, plus Michaels has some Spring things on sale! I just got it done and it makes me feel better already! I'm ready for spring weather now!!
This is a picture of the space above my stove in my kitchen. I love to decorate this area.
Have a great week!
This is a picture of the space above my stove in my kitchen. I love to decorate this area.
Have a great week!
Wednesday, February 24, 2010
Contest giveaway
Diane of A Primitive Journey blog and Forum is holding a contest / giveaway on her blog through Feb. 28th for a $25 gift card to either Hobby Lobby OR Michaels along with a tart warmer and tarts! What a great giveaway! Her blog is http://www.aprimitivejourney.com/. I just joined the forum and love it! Hurry the giveaway ends soon!
Thanks!
Thanks!
Thursday, February 11, 2010
Antiqued wood sign tutorial
I have been making these for a couple of years now. There are several steps to them. I use rough cut lumber from the lumber yard. I have a huge stack of it in my barn.
I then have to plane it and router the edges.
I then stain the sides and the back. I let it dry completely then paint the front of the sign with a white latex paint. It usually takes a couple of coats. I let that dry completely and sand with a fine sandpaper.
I then either hand paint the words on the sign or sometimes I use my vinyl cutting machine. I have a Roland GX-24. I can have the machine cut out the saying for me and I apply it to the sign.
Then I use a 2 step crackle process. I brush on step 1 and let it dry completely, then I brush on step 2. I like to put them both on kind of thick to make larger cracks in the finish. After the sign has dried overnight you will see the cracks have appeared in the finish.
I then take an antique gel and brush it onto the sign. I add just a little water to thin the gel so that it goes into all of the cracks. After I have a nice coating applied, I wipe it off with a soft towel. The gel will settle into the cracks.
I then let that dry completely and then I am ready to paint the grapevine and berries onto the bottom of the sign.
After it is dry, I measure and drill holes at the top of the sign to add the wire for hanging. This of course is optional. I curl the wire and attach it to the sign. I then add the berries and bow for the finishing touch!
Thanks for visiting.
Have a good weekend!
Click on pic to enlarge
Labels:
antiqued sign tutorial,
wood sign
Saturday, January 30, 2010
Wall Painting
Hi everyone, I wanted to share a painting that is in my daughters bedroom. I painted this a few years ago. I wanted to post a picture of it before she ''out grows'' it! She turns 11 today, so it's just a matter of time before she will want to pick out her own colors for her room. You can't see it in the picture, but the ceiling is also painted blue with clouds. We wanted something bright and cheerful for her room. It's nice to go in there especially on a day like today when the temperature is in single digits!! Can't wait for spring!!
Stay Warm!
Jodi
click on pic to enlarge
Stay Warm!
Jodi
click on pic to enlarge
Saturday, January 23, 2010
Wool Sunflowers
It seems as if sunflowers are catching my eye lately. I just made these sunflowers made of wool. I went outside to get sticks to use as the stems. I'm not sure if I will use the sticks or dowel rods. It's based on a pattern from Buttermilk Basin.
I found hand-dyed wool online and I cut it in strips for the flowers. I have been reading about different ways to dye wool yourself, but I don't think I'll be doing it anytime soon! Thanks for visiting!
Have a great weekend.
I found hand-dyed wool online and I cut it in strips for the flowers. I have been reading about different ways to dye wool yourself, but I don't think I'll be doing it anytime soon! Thanks for visiting!
Have a great weekend.
Tuesday, January 19, 2010
Craft Hope for Haiti
I just found a wonderful group that has a shop on Etsy.com. It's called Craft Hope . It's a group of crafters that have donated a craft item to be sold with the proceeds going to an organization called Doctors Without Borders They have already collected over $7000 in 2 days.
Please take the time to visit these websites.
http://www.etsy.com/shop/crafthope
http://doctorswithoutborders.org/
http://www.crafthope.com/
Please take the time to visit these websites.
http://www.etsy.com/shop/crafthope
http://doctorswithoutborders.org/
http://www.crafthope.com/
Wednesday, January 6, 2010
What ya working on Wednesday
I am making more of my handmade primitive sunflowers. I sold tons of these last year at the shows, so I thought I had better get started making more. I sold them in packs of 7 as bowl fillers and I put them in baskets too. I am trying to come up with some other ideas for them. People just love them!! I sold out of everything I had at the show.
This first pic is the sunflowers after I soaked them in a coffee/vanilla mix. ( Please excuse my paint covered desk!!) I let them dry then "fluff" them up a bit by separating the petals.
This picture is the finished basket.
I got my pattern for the sunflowers from a great blog by the Krazy Kraft Lady, here is a link to the pattern and her blog Primitive sunflower pattern
Have a great week!!
Jodi
Subscribe to:
Posts (Atom)